
Building a breastfeeding toolkit should feel empowering, but for many new parents, it quickly becomes overwhelming. Between researching pump models, stocking up on bottles, and figuring out which accessories actually work together, the process can spiral into confusion before a single drop of milk is expressed. What makes it worse is that the consequences of getting it wrong aren't just financial — they're deeply personal.
One of the most common and least-discussed problems new parents encounter is mismatched breast pump components. When flanges don't seal properly, bottles don't connect securely, or motor power doesn't align with accessory requirements, the result is weak suction, discomfort, and diminishing milk yield. For parents already navigating sleep deprivation and the emotional weight of feeding a newborn, these frustrations can feel like the final straw — sometimes leading to early pumping cessation altogether.
This guide is designed to change that. Whether you're assembling your setup for the first time or troubleshooting a system that just isn't performing, you'll find clear, practical guidance here. From decoding product specifications to testing your gear safely, this resource will help you select, combine, and use your breast pump and accessories with total confidence — so you can focus on what truly matters.
Why Breast Pump Compatibility is Crucial for New Parents
When every component of your breast pump system works in harmony, milk expression feels almost effortless. When it doesn't, the consequences ripple across every aspect of your feeding experience. Compatibility isn't a technical footnote — it's the foundation of an effective pumping setup, and getting it wrong affects far more than convenience.
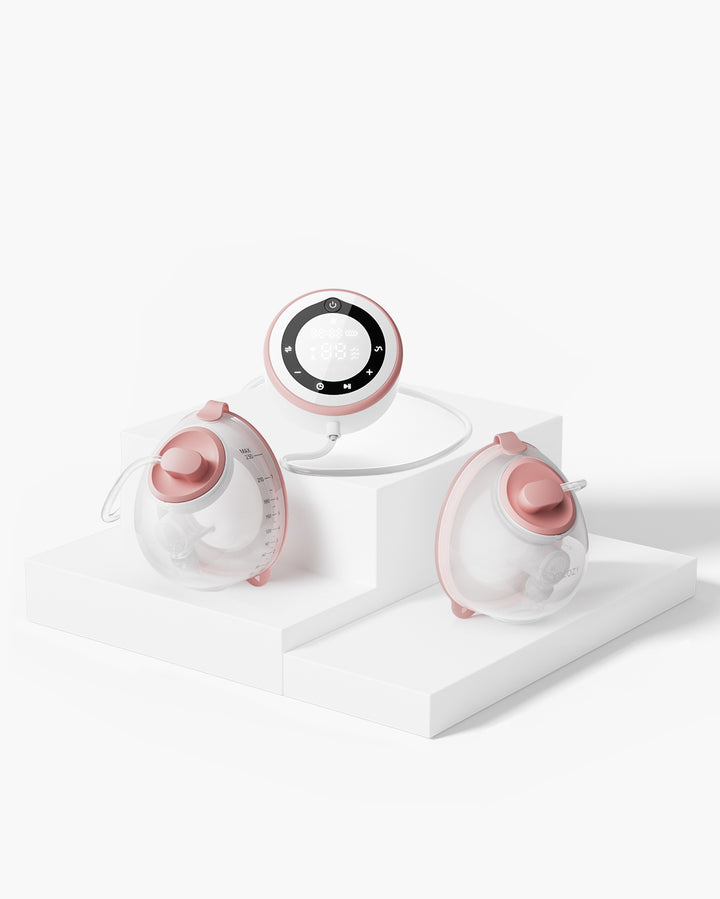
The most immediate impact shows up as poor suction. When a flange doesn't create a proper seal against the breast, the pump motor can't generate the vacuum pressure needed for efficient milk removal. The result is longer pumping sessions that yield less milk, which many parents mistakenly interpret as a supply issue rather than an equipment problem. Over time, this misreading leads to unnecessary anxiety and, in many cases, a decision to stop pumping altogether.
Physical discomfort is another serious consequence. An ill-fitting flange — even one that's just a few millimeters off — causes friction and pressure on sensitive nipple tissue, leading to soreness, swelling, and even bruising. Beyond pain, repeated trauma to the nipple can interfere with milk letdown, compounding the supply concerns even further.
There's also a significant financial cost. Purchasing accessories that turn out to be incompatible with your pump means wasted money and wasted time — two things new parents can least afford. Understanding compatibility from the start protects both your budget and your breastfeeding goals.
Top 3 Most Common Breast Pump Compatibility Pitfalls
Even well-researched parents fall into the same compatibility traps. Knowing what these pitfalls are before you buy can save you significant frustration down the road.
The first and most widespread mistake is assuming that all bottles and flanges are interchangeable. They're not. Breast pump manufacturers design their collection systems around proprietary threading, collar widths, and valve seats. A bottle from one brand may appear to fit a flange from another, but even a slightly imperfect seal can introduce air leaks that undermine suction — sometimes dramatically. Wide-neck and standard-neck connections are not cross-compatible without adapters, and even adapter solutions can reduce system efficiency. Always verify bottle-to-flange fit using the pump manufacturer's official compatibility list, not just visual inspection.

The second pitfall involves ignoring motor power and suction intensity levels when mixing components from different brands. Third-party accessories — shields, valves, and tubing — are often designed for average vacuum pressure ranges, but if your pump operates at higher or lower suction levels than expected, those parts may fail to seal correctly or degrade faster. This mismatch can silently reduce output without any obvious sign that something is wrong.
The third mistake is failing to verify whether a pump is classified as a single-user or multi-user device before sharing it or purchasing it secondhand. Single-user pumps have open systems where milk particles can enter the motor housing, creating both hygiene risks and performance degradation for a secondary user. Multi-user devices are engineered with closed systems specifically to prevent this. This distinction isn't always prominently marketed, so checking the product documentation directly is essential before making a purchase decision.
Decoding Key Specifications: What to Look For
Understanding Connection Types: Threads, Collars, and Adapters
Before purchasing any accessory, understanding how components physically connect is essential. Most breast pumps use either a wide-neck or standard-neck connection, and these two standards are not interchangeable without a dedicated adapter. Wide-neck collars typically measure around 63mm in diameter and are common in bottles designed for easier latching transitions, while standard-neck options sit closer to 28mm. The threading pattern matters just as much as the diameter — even two wide-neck components from different brands may use slightly different thread pitches that cause cross-threading or incomplete seals. When adapters are necessary, choose manufacturer-approved versions rather than universal third-party alternatives, which can introduce micro-gaps that silently compromise suction.
Analyzing Motor Power and Suction Specifications
Motor specifications tell you far more than speed — they define which accessories will actually work with your pump. Key figures to examine include maximum vacuum pressure (measured in mmHg), cycle speed (cycles per minute), and whether the pump offers adjustable suction phases. A pump operating at 250 mmHg peak pressure, for instance, requires valves and membranes rated to handle that range without deforming or losing seal integrity. When reviewing product documentation, look for the listed suction range rather than just the maximum, since accessories must perform reliably across the full operating spectrum. If a spec sheet only lists a single peak figure, contact the manufacturer directly to confirm the working range before pairing third-party parts.
Flange Fit and Material: Beyond the Standard Size
Flange compatibility is not purely a matter of diameter. While most sizing guides focus on nipple width — recommending flanges that allow roughly 1 to 3mm of clearance around the nipple — the material flexibility of the flange plays an equally important role. Rigid plastic flanges hold their shape consistently but offer no forgiveness for anatomical variation, whereas silicone flanges compress slightly to conform to breast tissue, often improving seal quality without requiring a size change. Parents who experience discomfort despite using the "correct" size frequently benefit from switching materials rather than resizing. Always cross-reference both the diameter measurement and the material type when evaluating flange compatibility with your pump's collection kit.
A Step-by-Step Guide to Ensuring Breast Pump Compatibility
Step 1: Audit Your Current Gear (Pump, Bottles, Parts)
Start by gathering every component you own or plan to use — pump motor unit, flanges, valves, membranes, tubing, bottles, and caps — and record the brand and model number for each. This information is usually printed on the component itself or listed in the original packaging. Pay close attention to connection points: note whether each bottle uses a wide-neck or standard-neck collar, and check whether your flanges carry any compatibility markings. Create a simple reference list with this data before you buy a single additional part. This audit prevents the all-too-common situation of purchasing accessories that seem familiar but belong to a slightly different product generation or model line that uses an updated connection standard.
Step 2: Research Before You Buy – The Compatibility Checklist
Once you know exactly what you have, cross-reference each component against your pump manufacturer's official compatibility documentation. Most major brands publish compatibility charts on their websites, often organized by pump model and component type. If you can't find this information online, contact the manufacturer's customer support directly — ask specifically whether the accessory is tested and certified for use with your pump's model number, not just the brand family. Key questions to ask include: What is the maximum vacuum pressure this accessory is rated for? Is this part compatible with both the stimulation and expression phases of my pump cycle? Does using this accessory void my pump warranty? For third-party accessories, look for products that explicitly list compatible pump models in their product documentation rather than relying on terms like "universal fit," which rarely means truly universal.
Step 3: Test Your Setup Safely Before Full Use
Before committing to a full pumping session, run a dry test of your assembled system. Attach all components as you would for normal use, then activate the pump at its lowest suction setting and press the flange gently against your palm. A properly sealed system will create a firm, even vacuum against your skin that releases cleanly when you break the seal by lifting a finger. If you notice pulsing air leaks, inconsistent suction, or a valve that flutters irregularly, one or more components are not sealing correctly. At this point, disassemble and re-inspect each connection point for misaligned threading, cracked membranes, or deformed valve seats. Only move to actual use once the test confirms steady, consistent vacuum pressure across the complete cycle — stimulation phase and expression phase both.
Special Considerations: Nursing Bras and Accessory Harmony
When most parents think about pump compatibility, they focus on flanges and bottles — but the nursing bra you wear during sessions plays a surprisingly significant role in your pumping outcomes. A poorly chosen bra can counteract even a perfectly assembled pump system by disrupting flange position, breaking the seal, or restricting milk flow through unnecessary breast compression.
Hands-free pumping bras are particularly worth scrutinizing before purchase. Some are designed as universal solutions with open-ended port holes that accommodate any flange size, while others are built with brand-specific ports sized to a narrow diameter range. Brands like Momcozy, which produce both pumping bras and breast pumps, publish detailed compatibility guides pairing their bra port sizes with specific flange diameters — a useful reference even if you're shopping for components from different manufacturers. If your flanges are on the larger end of the spectrum — or if you've switched to silicone flanges that have a slightly different profile — a brand-specific bra may not hold them securely against the breast. Always check the listed flange diameter range on a pumping bra before assuming it will work with your setup.
Beyond fit, the bra's compression level matters. A hands-free bra should hold flanges firmly in place without pressing hard against breast tissue, which can impede milk ducts and reduce output. Look for designs that distribute tension evenly rather than concentrating pressure at the flange entry points. For parents who use a nursing bra interchangeably for both feeding and pumping, ensure the bra's drop-down clips don't interfere with flange placement when open. Treating your nursing bra as a functional component of your pump system — rather than purely a comfort item — means fewer disrupted sessions and more consistent results.
Maintaining Your Compatible System: Care and Updates
A compatible system doesn't stay that way without regular attention. Valves and membranes are the most vulnerable components — they're under constant stress during every session, and even small cracks or deformations in these parts can break the seal integrity of an otherwise well-matched setup. Inspect valves and membranes every two to four weeks for signs of thinning, discoloration, or warping, and replace them on the manufacturer's recommended schedule rather than waiting for visible failure. Tubing should also be checked regularly for moisture buildup or micro-tears, both of which affect suction consistency.
Beyond physical wear, manufacturers periodically release updated component versions that may alter connection standards or performance specifications. Check the manufacturer's website every few months — particularly after a pump firmware update or product line refresh — to confirm that your current accessories still correspond to the latest recommended specifications. If a replacement part carries a new version number, verify compatibility with your existing pump model before installing it, since even minor design revisions can affect how components seal and interact across a full pumping cycle.
Build Your Pumping System with Confidence
Building a breast pump system that truly works comes down to one thing: informed decision-making at every step. The pitfalls covered in this guide — mismatched connections, overlooked motor specifications, ill-fitting flanges, and incompatible accessories — are all avoidable with the right knowledge in hand. None of them require advanced technical expertise to navigate. They simply require knowing what questions to ask, where to find reliable answers, and how to test your setup before it matters most.
A compatible pumping system saves you more than money. It saves time you'd otherwise spend troubleshooting, protects you from unnecessary physical discomfort, and removes a layer of stress from an already demanding season of life. When your gear works together seamlessly, you can focus your energy where it belongs — on feeding your baby and taking care of yourself.
Use this guide as a practical reference, not just a one-time read. Return to the compatibility checklist when you're considering new accessories, revisit the maintenance section as your pump ages, and don't hesitate to contact manufacturers directly when documentation leaves gaps. You now have the tools to build a pumping system with confidence. Trust that knowledge, and your breastfeeding journey will be better for it.